Planning Your Accessible Bathroom: Before You Start
So, you're thinking about making your bathroom more accessible. Maybe it's for an older parent, a family member who has trouble getting around, or just getting your Malibu home ready for what's ahead. That's a really smart move. But before you even think about swinging a hammer, you need a plan. This isn't just about sticking up a grab bar; it's about building a space that's genuinely safe and easy for everyone to use.
First off, think about who'll actually be using it. What exactly do they need? Someone with a walker has different requirements than someone in a wheelchair, or even someone who just needs a bit more stability. Measure everything, and I mean everything. Doorways, the current shower opening, the space around the toilet – you really need to know what you're working with. A lot of older Malibu homes, especially those tucked away in the hills, weren't exactly built with accessibility in mind. Doorways can be pretty narrow, and bathrooms often feel cramped.
What can you do yourself right now? Plenty! You can look up ADA guidelines (that's the Americans with Disabilities Act) for general dimensions; even though they're technically for public spaces, they give you a fantastic starting point. You can measure your own bathroom, sketch out some ideas, and even start browsing accessible fixtures online. But don't commit to anything big just yet, okay? This is the "dream and scheme" phase.
During the Project: What to Tackle and When to Call Us
Alright, you've got your plan. Now comes the actual work. There's a whole range here, from simple upgrades to full-blown renovations. Let's break down what's realistic for a DIYer and what truly needs a professional touch.
DIY-Friendly Upgrades
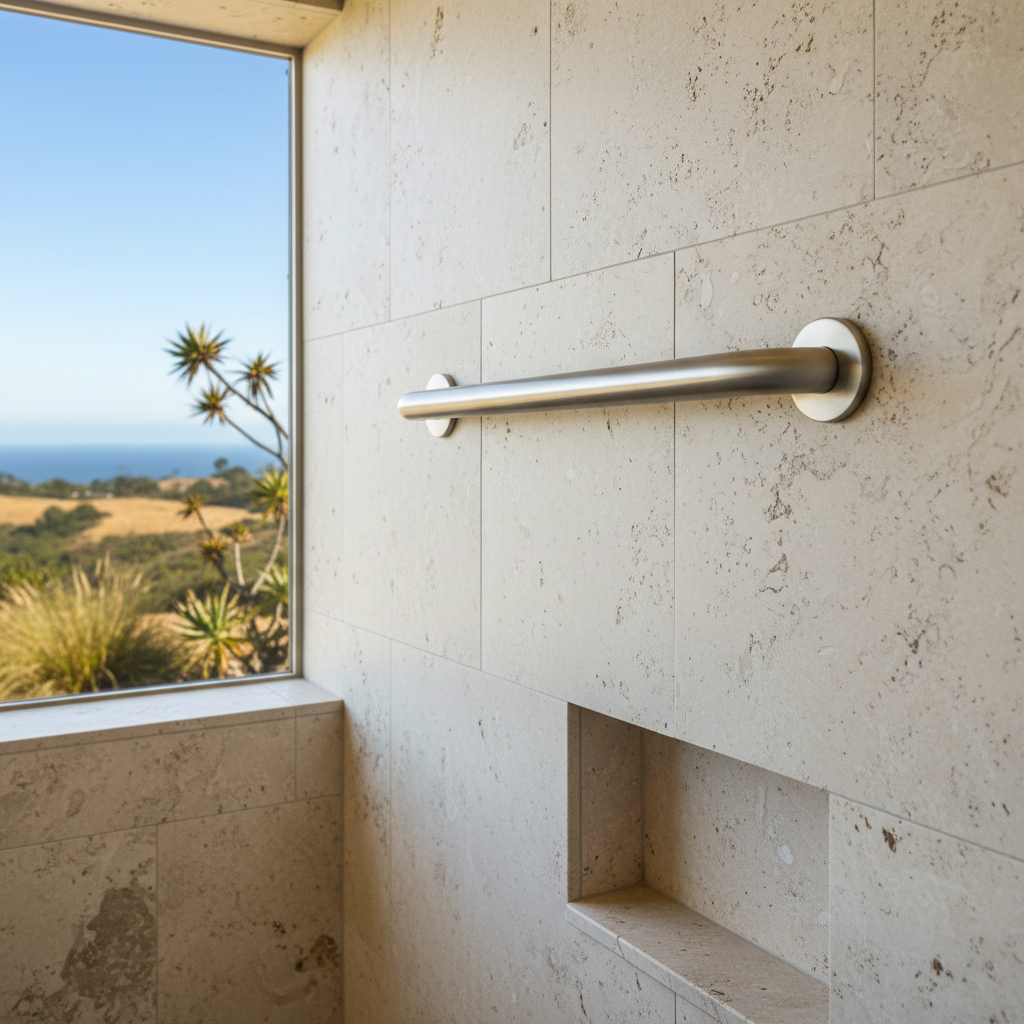
- Grab Bars: This is probably the most common and easiest accessible upgrade. You can absolutely put grab bars in yourself, but here's the crucial part: they MUST be anchored into wall studs or some solid blocking. Drywall anchors just won't cut it. I've seen too many accidents because someone thought a toggle bolt would be enough. Grab a stud finder, mark your spots, pre-drill, and use long, heavy-duty screws.
- Raised Toilet Seats: These just sit right on your existing toilet. Super easy.
- Non-Slip Mats or Strips: Again, these are simple to add to your shower or tub.
- Lever Handles: Swapping out those old knob handles for lever handles on faucets and doors is usually a pretty straightforward plumbing or hardware job you can do with basic tools.
When to Call a Pro (Like Malibu Bathroom Construction)
- Widening Doorways: If you need to widen a doorway to fit a wheelchair (we're usually talking 32-36 inches of clear opening), you're looking at structural changes. This isn't just about how it looks; it involves the framing, drywall, and maybe even electrical or plumbing if switches are nearby. You definitely need a contractor for this.
- Roll-In Showers: This is a big one. Building a curbless, roll-in shower means getting the slope right for drainage, serious waterproofing, and often moving plumbing. If it's not done correctly, you're facing leaks, water damage, and a very expensive fix down the line. This is 100% a job for experienced professionals who really understand proper waterproofing membranes and tiling techniques.
- Lowering Sinks/Counters: Adjusting counter heights means reconfiguring cabinets, plumbing, and sometimes even electrical outlets. It's more complicated than it seems.
- Toilet Relocation or Wall-Mounted Toilets: Moving a toilet involves changing the waste line, which is a major plumbing job. Installing a wall-mounted toilet needs specific in-wall carrier systems and structural support. Seriously, don't mess with your main waste lines unless you're a licensed plumber.
- Structural Reinforcement: If you're adding heavy fixtures or need to make sure walls can handle significant weight for future modifications, a professional can assess and reinforce things properly.
- Electrical Work: Adding new outlets, moving light switches lower, or putting in specialized lighting for better visibility – if it involves wires behind walls, call an electrician.
Honestly, for anything that means opening walls, moving plumbing, or changing the basic layout of your bathroom, you're much better off hiring a licensed contractor. We know the codes, we have the right tools, and we can make sure it's done safely and correctly the first time. We've seen too many DIY projects go sideways, costing folks more in the long run.
After the Project: Maintaining Your Accessible Space
Once your accessible bathroom is all done, the "after" phase is mostly about keeping it maintained and making sure everything stays safe. Regularly check your grab bars to confirm they're still solid. Give them a good tug every few months. If anything feels loose, fix it right away. Also, check for any leaks around your new shower or sink, especially if you had plumbing work done.
Keep the space clear. Clutter can easily become a tripping hazard, even in a well-designed accessible bathroom. Make sure pathways are always open. If you've installed a roll-in shower, keep the drain clear of hair and soap scum to prevent pooling. That's really about it. Enjoy the comfort that comes with a bathroom that truly works for everyone.
Making your home more accessible is an investment in comfort and safety. Do what you can yourself, but don't hesitate to bring in the pros for the big stuff. It's always worth it.